Hiking navigation is not about choosing between a paper map, a compass and GPS. You need to know what each one is good at, where it can let you down, and how to use them together before the cloud drops on a ridge or a woodland path splits three ways.
In This Article
- Hiking Navigation Map, Compass and GPS: What Each Tool Does
- Paper Map Basics: Scale, Symbols and Grid References
- Compass Basics: Orienting, Bearings and Back Bearings
- GPS Basics: Phones, Watches and Handheld Units
- Build a UK Navigation Kit Without Overspending
- Navigate a Walk Step by Step
- When Visibility Drops or You Miss a Turn
- Frequently Asked Questions
Hiking Navigation Map, Compass and GPS: What Each Tool Does
Good hiking navigation map, compass and GPS use starts with a boring but useful truth: each tool answers a different question.
A paper map answers, “What is around me?” It shows slopes, paths, access land, walls, streams, woods, crags, car parks, rights of way and escape routes. It is the best planning tool because it gives you the whole landscape at once. On a proper OS Explorer map, the difference between a gentle valley path and a steep pull up a contour stack is visible before you leave the kitchen table.
A compass answers, “Which way is north, and which direction should I walk?” It does not tell you where you are. That catches beginners out. A compass is powerful when it is paired with the map: orienting the map, taking a bearing, checking a path direction, or walking through mist when the next landmark has vanished.
GPS answers, “Where am I right now?” A phone app, GPS watch or handheld unit can confirm your grid reference, show whether you are drifting off a planned route, and record where you have been. It is brilliant until the battery dies, the touchscreen is wet, the downloaded map is missing, or you follow a purple line without understanding the ground.
For UK hills, I treat GPS as a check, not the boss. The Met Office mountain safety advice makes the same point in plainer terms: GPS is useful, but map and compass skills still matter when visibility drops. That is not old-school gatekeeping. It is what keeps a minor wrong turn from becoming a long, cold faff. If you are still building the rest of your walking setup, our backpacks buying guide for beginners is a useful companion because carrying a map only helps if you can reach it without unpacking half your bag.
The sensible hierarchy
Use the map to understand the route, the compass to control direction, and GPS to confirm position. If all three agree, keep moving. If one disagrees, stop and work out why before you walk further.
This matters on ordinary walks too. I have seen people get more lost in Forestry Commission-style woodland than on open hills because every track looks plausible and the phone arrow wobbles under trees. A map and compass do not panic when signal or confidence disappears.
Paper Map Basics: Scale, Symbols and Grid References
For most UK walking, an OS Explorer 1:25,000 map is the easiest paper map to learn on. The scale means 4cm on the map equals 1km on the ground, and the detail is high enough for field boundaries, access land, rights of way and smaller paths. OS Explorer paper maps currently cost about £12.99-£16.99 from Ordnance Survey, with occasional bundle deals such as three paper maps for £23.
OS Landranger 1:50,000 maps cover a bigger area but show less detail. They are fine for road touring and broader planning, but for learning hiking navigation I would buy the Explorer first. If you only walk in one national park, choose the map sheet that covers the area you actually use. Buying five maps for imaginary trips is a classic outdoor-kit trap.
Read contours before paths
Paths are tempting because they look like the route. Contours tell you how the route will feel. Close contour lines mean steep ground; wide spacing means gentler ground. Ring-shaped contours can show a summit or knoll. V-shaped contours often point up valleys or re-entrants.
Before a walk, scan the map for:
- Big climbs: tight contour stacks, especially after a river crossing or valley path.
- Catching features: roads, walls, streams, ridgelines or woods that tell you if you have gone too far.
- Escape options: lower paths, nearby roads, villages, bus stops or obvious tracks back to the start.
- Confusing junctions: places where several paths meet or where the mapped path crosses open access land.
This is where a paper map beats a tiny phone screen. You can see the shape of the day, not just the next 200 metres.
Pack the map where you will actually use it. The same logic applies to food, waterproofs and spare layers; our guide to packing a rucksack for hiking covers that layout in more detail.
Grid references without making it weird
Grid references sound schoolish, but they are practical. A four-figure grid reference identifies a 1km square. A six-figure reference narrows that to roughly 100m, which is usually enough for describing a location to someone else or checking your position against a GPS reading.
The simple rule is along first, then up. Read the eastings along the bottom of the map, then the northings up the side. The Ordnance Survey compass guide is worth bookmarking because it explains the map-and-compass relationship without turning it into a military exercise.
If you use OS Maps Premium, the annual subscription is £35.99 or £7.49 monthly at the time of writing. I like it for route planning and offline maps, but I would still carry a paper map on remote walks. Phones are too useful for emergency calls, photos and weather checks to spend the whole day as your only navigation tool.
Compass Basics: Orienting, Bearings and Back Bearings
A basic baseplate compass is enough for most walkers. You do not need a sighting compass for normal footpaths, but you do need a rotating bezel, clear baseplate, direction-of-travel arrow and map scales. Decathlon’s Explorer 500 is £9.99 and usable for learning. A Silva Ranger No. 3 is about £24.99, while a Silva Expedition 4 is about £29.95-£49.99 depending on retailer and version. The Silva feels nicer in the hand, but the cheap Decathlon option is not a toy.
Orient the map first
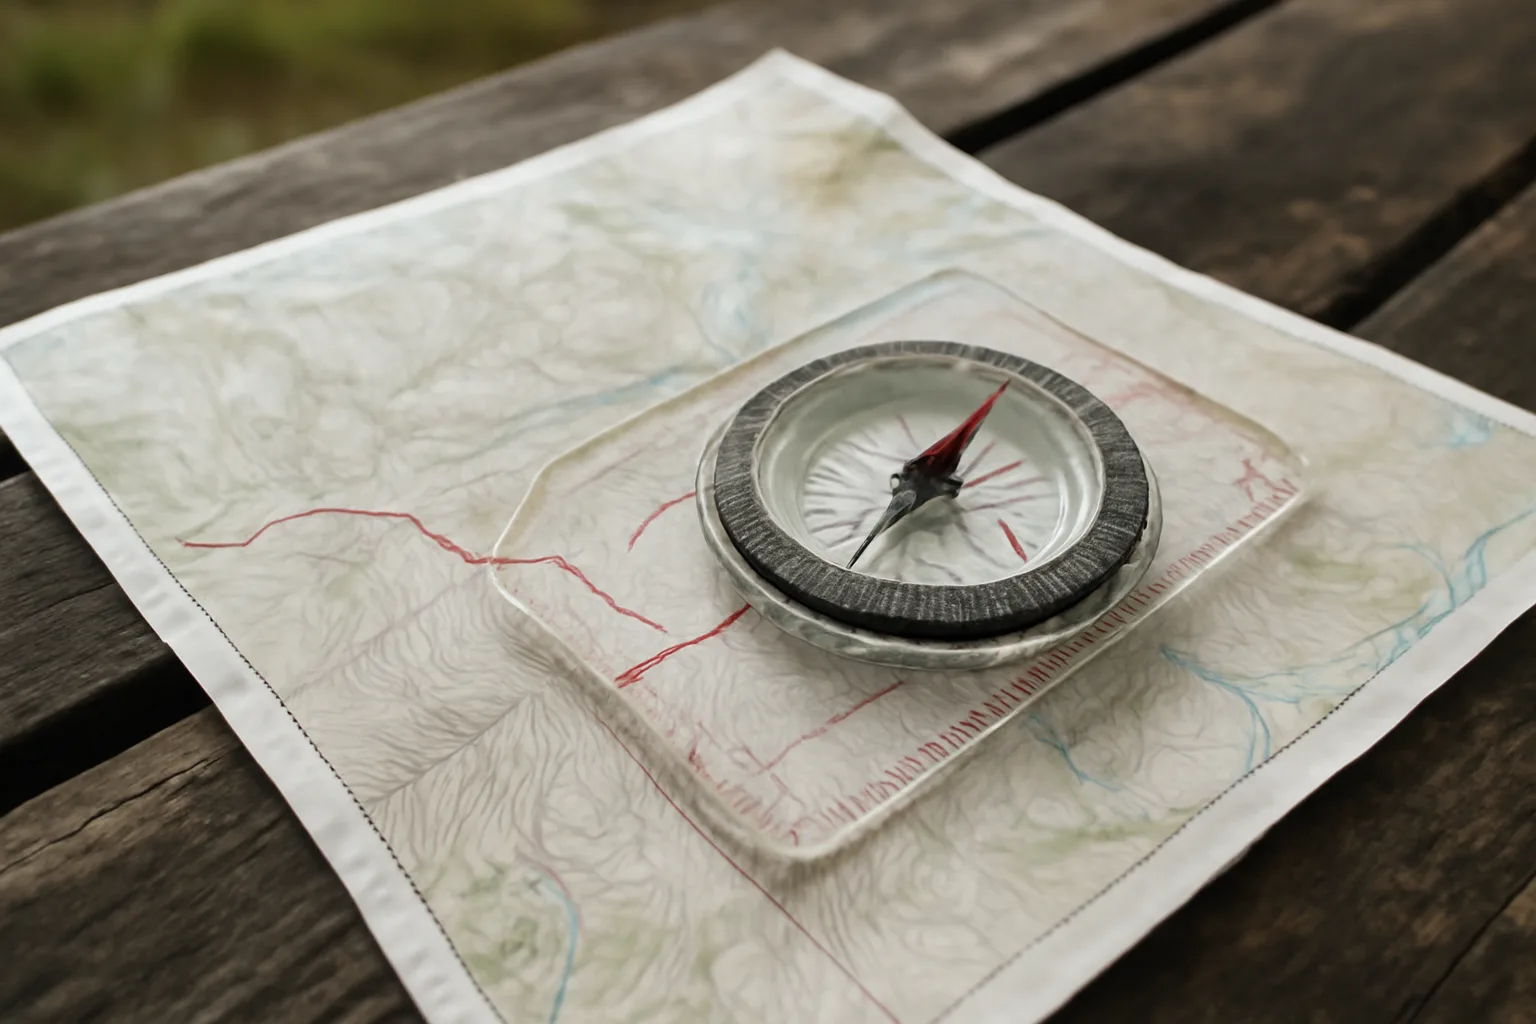
Orienting the map means turning the map so north on the map lines up with north on the ground. Put the compass on the map, line the edge up with a north-south grid line, then rotate the whole map until the red needle points to the top of the map. Suddenly paths, valleys and walls should sit in the same direction as the real world around you.
Do this at the car park, then again at junctions. It makes the map easier to read because left on the map is roughly left in front of you. Beginners often hold the map fixed like a book, then wonder why nothing matches.
Take a bearing when the path is unclear
A bearing is simply a direction to follow. The short version:
- Put the compass edge on the map from where you are to where you want to go.
- Turn the bezel until the orienting lines inside it match the map’s north-south grid lines.
- Lift the compass and hold it flat in front of you.
- Turn your body until the red needle sits inside the orienting arrow.
- Walk in the direction-of-travel arrow, checking the map and ground as you go.
Do not stare at the compass for 800m. Pick a tree, boulder, gate or fence corner on the bearing, walk to it, then check again. On open moorland, that habit stops you slowly curving off line.
Use back bearings to sense-check yourself
A back bearing points back where you came from. If you leave a path junction on a bearing of 80 degrees, the back bearing is roughly 260 degrees. You do not need to do mental gymnastics: add or subtract 180. If your return direction makes no sense against the path or valley behind you, stop.
This is especially useful in mist. Looking back often shows whether the ground still matches the map. If it does not, it is better to correct early than after another kilometre of stubborn optimism.

GPS Basics: Phones, Watches and Handheld Units
GPS is useful. Pretending otherwise is just outdoor theatre. The trick is knowing which version you actually need.
A phone with OS Maps, Komoot, Outdooractive or AllTrails is enough for many lowland walks. The cost can be almost nothing if you use free mapping, or about £35.99 a year for OS Maps Premium. The downside is battery, rain, gloves, cracked screens and the temptation to follow the line without reading the terrain.
A GPS watch is convenient because it sits on your wrist and gives quick distance, direction and breadcrumb data. Entry-level outdoor-friendly watches start around £180-£250, while full mapping watches from Garmin, Coros or Suunto often sit around £350-£700. For most walkers, that is overkill unless you also run, cycle or train regularly.
A handheld GPS, such as a Garmin eTrex SE or eTrex 22x/32x, is more robust and glove-friendly. UK prices vary, but expect roughly £150-£260 depending on mapping and model. The Garmin eTrex 32x has proper mapping, an electronic compass and barometric altimeter, which is useful in poor visibility, but it still does not remove the need to understand the map.
What GPS is best at
GPS is excellent for:
- Confirming position: especially with a six-figure grid reference.
- Checking drift: seeing if you have moved off the planned line.
- Timing progress: comparing actual pace against your route plan.
- Finding a missed junction: checking whether you passed the turn 50m or 500m ago.
GPS is poor at judgement. It does not know that the “path” is a knee-deep bog, that a river is high after rain, or that a shortcut crosses private land. The map still matters.
Battery discipline
On a full-day walk, start with your phone at 100%, download offline maps, put it in battery saver mode, and carry a small power bank. A 10,000mAh Anker or INIU power bank is usually £15-£25 on Amazon UK and weighs about 180-220g. That is cheaper than a dedicated GPS and more useful if someone else’s phone dies.
Keep the phone warm in winter. Cold batteries drop fast. I keep mine in an inner pocket rather than the top lid of a rucksack, because discovering a dead phone at a foggy junction is a poor lifestyle choice.
Build a UK Navigation Kit Without Overspending
You can build a reliable beginner navigation kit for less than the price of many waterproof jackets. Spend money where it changes the outcome, not where it looks technical.
Budget kit for local walks
For lowland paths, country parks, towpaths and familiar hills, this is enough:
- OS Explorer map for the area: £12.99-£16.99, or a waterproof Active version for about £16.99.
- Basic baseplate compass: Decathlon Explorer 500 at £9.99, or similar.
- Phone with offline map: free to £35.99/year depending on app and mapping.
- Power bank and cable: about £15-£25.
- Pencil and small freezer bag: under £3, but oddly useful for route notes and keeping paper dry.
That setup is not flashy. It works.
Mid-range kit for UK hills
If you are doing Lake District, Eryri/Snowdonia, Peak District edges, Scottish glens or wintery moorland, I would upgrade the compass before buying a GPS unit. A Silva Ranger or Expedition-style compass is easier to trust in poor weather, and a laminated map or waterproof case saves misery.
Add:
- Better compass: around £25-£50.
- Waterproof map case: about £12-£20 from Cotswold Outdoor, Go Outdoors or Amazon UK.
- Whistle and small head torch: £5-£25 combined if you already own neither.
- Printed route card: free, but it forces you to know key bearings, distances and escape points.
If you regularly walk alone in remote places, a satellite communicator is a separate decision. Garmin inReach devices and plans are not cheap, often £250+ for the unit plus subscription, but they solve a different problem: calling for help beyond phone signal. Do not buy one instead of learning navigation.
The same budget logic applies across outdoor kit. A £50 compass and a £30 waterproof map case are better navigation upgrades than a premium pack if your current bag already fits; if it does not, start with our best day packs for UK walks guide before spending on electronics.
Navigate a Walk Step by Step
Navigation feels less mysterious when you turn it into a routine. The aim is not to walk with your nose in the map. The aim is to always know what should happen next.
Before you leave
Plan the route at home while you are warm and mildly smug. Mark the start, main path junctions, high points, river crossings, road crossings and escape routes. Check the weather, especially wind, cloud base and rain timing. For hill days, use the Met Office mountain forecast or MWIS rather than a generic town forecast. If rain is likely, sort your shell before you worry about gadgets; our waterproof jackets for hiking guide explains the difference between casual shower resistance and proper hill protection.
Then write a rough route card:
- Leg 1: car park to bridge, 1.2km, follow stream north-east.
- Leg 2: bridge to ridge path, 900m, climb steeply, expect wall on left.
- Leg 3: ridge path to summit shelter, 1.5km, bearing needed if cloud drops.
- Escape: descend west to lane if weather worsens before summit.
Those notes do not need to be beautiful. They need to make sense when your hands are cold.
At the start
Orient the map. Find your current position. Identify two or three visible features: a road bend, wood edge, stream, hill shape, church tower, car park or wall junction. Match them to the map before moving. This is also the point to check layers against the day ahead; our seasonal guide to what to wear hiking in the UK is more useful than trying to make clothing decisions after the first squall.
If you are using GPS, check that the app opens offline, the route is loaded and the battery is healthy. Do not discover at the first wrong turn that your map tiles only existed on Wi-Fi.
On each leg
Use a simple cycle:
- Know the next feature before you start walking: junction, bridge, wall corner, summit, stile or stream.
- Estimate distance and time so you know when to expect it.
- Check direction with the compass if the path is faint or there are several options.
- Tick off features as they appear, rather than waiting until you feel lost.
- Confirm with GPS when the ground and map do not quite agree.
This is the habit that separates calm navigation from wandering and hoping. You are constantly asking, “What should I see next?” If the answer does not appear, you stop early.
Use distance properly
Distance is not just fitness data. On a 1:25,000 map, each grid square is 1km. If your route says the next junction is 700m and you have walked 1.4km, you probably missed it. A GPS watch or phone distance can help, but pacing works too once you know your rough stride count per 100m.
Do not obsess over exact numbers. Use distance as a warning light. If the map says “stream in 300m” and there is no stream after ten minutes, do not keep marching because the path feels friendly.
When Visibility Drops or You Miss a Turn
The worst navigation decisions usually happen after the first mistake. Someone misses a junction, feels embarrassed, keeps moving, then tries to bend the map to match where they wish they were. No judgement, we’ve all had a version of that moment.
The fix is to stop making the error bigger.
If visibility drops
Put a layer on before you get cold, then sort the navigation. Orient the map, identify your last known point, and choose the next safe feature. If the route crosses open ground, use a bearing and short legs. Pick nearby targets you can actually see, not a cairn half a kilometre away in cloud.
Avoid descending unknown steep ground just because “down” feels safer. In UK hills, down can mean crags, scree, rivers, bogs or a much longer walk out. The map tells you which down is sensible.
If you miss a turn
Use the three-step reset:
- Stop as soon as doubt appears. Do not walk another 20 minutes to “see if it sorts itself”.
- Find your last certain point: bridge, stile, stream crossing, road bend, trig point, obvious junction.
- Relocate from evidence: direction of slope, nearby water, walls, woodland edge, GPS grid reference and distance walked.
If you can safely return to the last certain point, do that. It feels annoying, but it is usually faster than inventing a new route across rough ground.
When to turn back
Turning back is not failure. It is a navigation decision. If visibility is poor, daylight is dropping, batteries are low, or the next leg involves open featureless ground, use the escape route you planned earlier. If there is any chance you will finish near dusk, a head torch belongs in the pack; our best head torches for hiking and camping guide covers the practical beam and battery trade-offs.
This is why the best navigation happens before the walk. A good route plan gives you dignified options. A bad one gives you a heroic story nobody asked for.
Frequently Asked Questions
Do I need a paper map if I use OS Maps on my phone? For low-risk local walks, a downloaded phone map may be enough, but for remote hills I would still carry a paper OS map. Phones can fail, batteries drain quickly in cold weather, and paper gives you a wider view of escape routes.
What is the best compass for beginner hikers? A basic baseplate compass with a rotating bezel is enough. The Decathlon Explorer 500 at £9.99 is fine for learning, while a Silva Ranger around £24.99 feels more robust if you walk regularly.
Is GPS more accurate than a compass? GPS is usually better at telling you where you are. A compass is better at giving a reliable direction when paired with a map. The best setup is not GPS or compass; it is GPS plus map-and-compass skill.
How do I practise navigation safely? Start in a familiar park, common or lowland area. Pick short legs between obvious features, take bearings, estimate distance, and compare your position with GPS. Do not make your first practice session a misty mountain day.
What scale map is best for UK hiking? OS Explorer 1:25,000 is the best starting point for most UK walking because it shows more path, boundary and terrain detail than 1:50,000 Landranger maps.
Can I use Google Maps for hiking? Google Maps is useful for roads, car parks and nearby villages, but it is not detailed enough for proper UK footpath navigation. Use OS Maps, a paper OS map or another outdoor mapping app instead.