Most hiking backpacks are water-resistant when new, not properly waterproof. This waterproof backpack guide shows you how to get more rain protection from the pack you already own, where sprays and seam sealers help, and when a rain cover or dry bag is the better answer.
In This Article
- What Waterproofing a Backpack Can and Cannot Do
- Check the Weak Points Before You Buy Anything
- Clean the Fabric Before Reproofing
- How to Reproof the Outside of Your Backpack
- Use a Rain Cover, Pack Liner, or Dry Bags
- Fix Seams, Zips, and Worn Base Panels
- When a Backpack Is Too Far Gone
- Frequently Asked Questions
What Waterproofing a Backpack Can and Cannot Do
Waterproofing a backpack is really about slowing water down. A decent treatment helps rain bead on the outer fabric, a cover keeps the worst weather off the bag, and dry bags protect the things that would ruin your day if they got soaked. None of that turns a stitched hiking pack into a canoe barrel.
That distinction matters in the UK because rain is rarely neat. A short shower on a Cotswold walk is one thing; sideways rain on an exposed ridge is another. Before a long walk, I check the Met Office weather warnings as well as the local forecast, because heavy rain plus wind changes how much protection a backpack needs.
The realistic target
Your target is a pack that sheds surface rain, resists splash from wet grass, and gives your spare layers, phone, map and first-aid kit a second line of defence. The outside can still end up damp. The inside should stay usable.
A spray-on reproofer, such as Nikwax TX.Direct Spray-On at about £12 from Go Outdoors or Amazon UK, is useful when water no longer beads on the fabric. Grangers Performance Repel Plus is similar money, usually £12-£14 from Cotswold Outdoor or Amazon UK, and works well on nylon day packs. I would buy whichever is easier to find locally rather than treating one as magic.
What spray will not fix
Spray will not repair a split seam, a cracked waterproof coating, a torn zip, or a base panel that has been scraped through on rock. If water is coming through the stitching around the lid, the zip garage, or the bottom corners, you need a repair step as well as a fabric treatment.
This is where a lot of people waste money. They spray the whole bag, see water still appearing inside, then blame the product. Usually the weak point was never the face fabric.
Check the Weak Points Before You Buy Anything
Empty the pack and look at it in daylight before ordering a treatment. It takes five minutes and saves you from buying the wrong thing.
Do a simple water-bead test
Put the empty backpack on a towel, spray clean water across the front panel and lid, then wait for two minutes. If the water forms beads and rolls off, the face fabric is still doing its job. If it darkens the fabric and spreads into flat patches, the durable water repellent finish has worn down.
Pay close attention to:
- Lid and zip areas: rain sits here when the pack is upright.
- Shoulder strap seams: repeated movement can open tiny stitch holes.
- Base panel: this gets wet on grass, mud, station platforms and bothy floors.
- Side pockets: mesh and stretch fabric often hold water rather than repel it.
If you are not sure whether the issue is dirt or failed waterproofing, read our hiking backpack cleaning guide first. Mud, body oils and detergent residue can all make water spread across fabric.
Check the internal coating
Older packs often have a thin polyurethane coating on the inside. If it feels sticky, flakes into white dust, or smells sharply plasticky, the coating is breaking down. Reproofing the outside may still help in light rain, but I would not trust that pack for a wet multi-day walk without a liner.
For a commute or short hill walk, that may be fine. For a loaded weekend pack, I would move valuables into dry bags and start thinking about replacement.
Clean the Fabric Before Reproofing
Reproofing a dirty backpack is like waxing a muddy car. The product sits on grit and salt rather than bonding to the fabric.
Quick clean for a lightly used pack
For a day pack that is only dusty, a cloth and lukewarm water are enough. Brush out the inside, wipe the outer panels, clean around zips with an old toothbrush, and leave it to dry until it is damp rather than dripping. Most spray-on treatments work best on clean damp fabric, but check the bottle.
Do not put a hiking backpack in the washing machine unless the care label says you can. Foam back panels, frame sheets and hip belts can twist or delaminate. The safer option is a bath, shower tray or large plastic storage box.
Deeper clean for salt, sweat and mud
If the pack has been used for coastal walks, winter hikes or sweaty summer days, give it a proper hand wash:
- Remove loose kit: take out poles, bottles, rain covers, hip-belt pockets and any removable frame sheet.
- Brush dry mud first: wet mud smears into seams and zip teeth.
- Use lukewarm water: hot water can damage coatings and adhesives.
- Use technical cleaner if needed: Nikwax Tech Wash is about £6-£8; Grangers Performance Wash is usually £6-£9.
- Rinse well: leftover cleaner reduces water beading.
- Dry slowly: hang it indoors or in shade, not over a radiator.
For very muddy trips, this step matters more than the brand of spray. Based on UK user reviews, most failed reproofing attempts come down to poor preparation or spraying too lightly, not the product being useless.
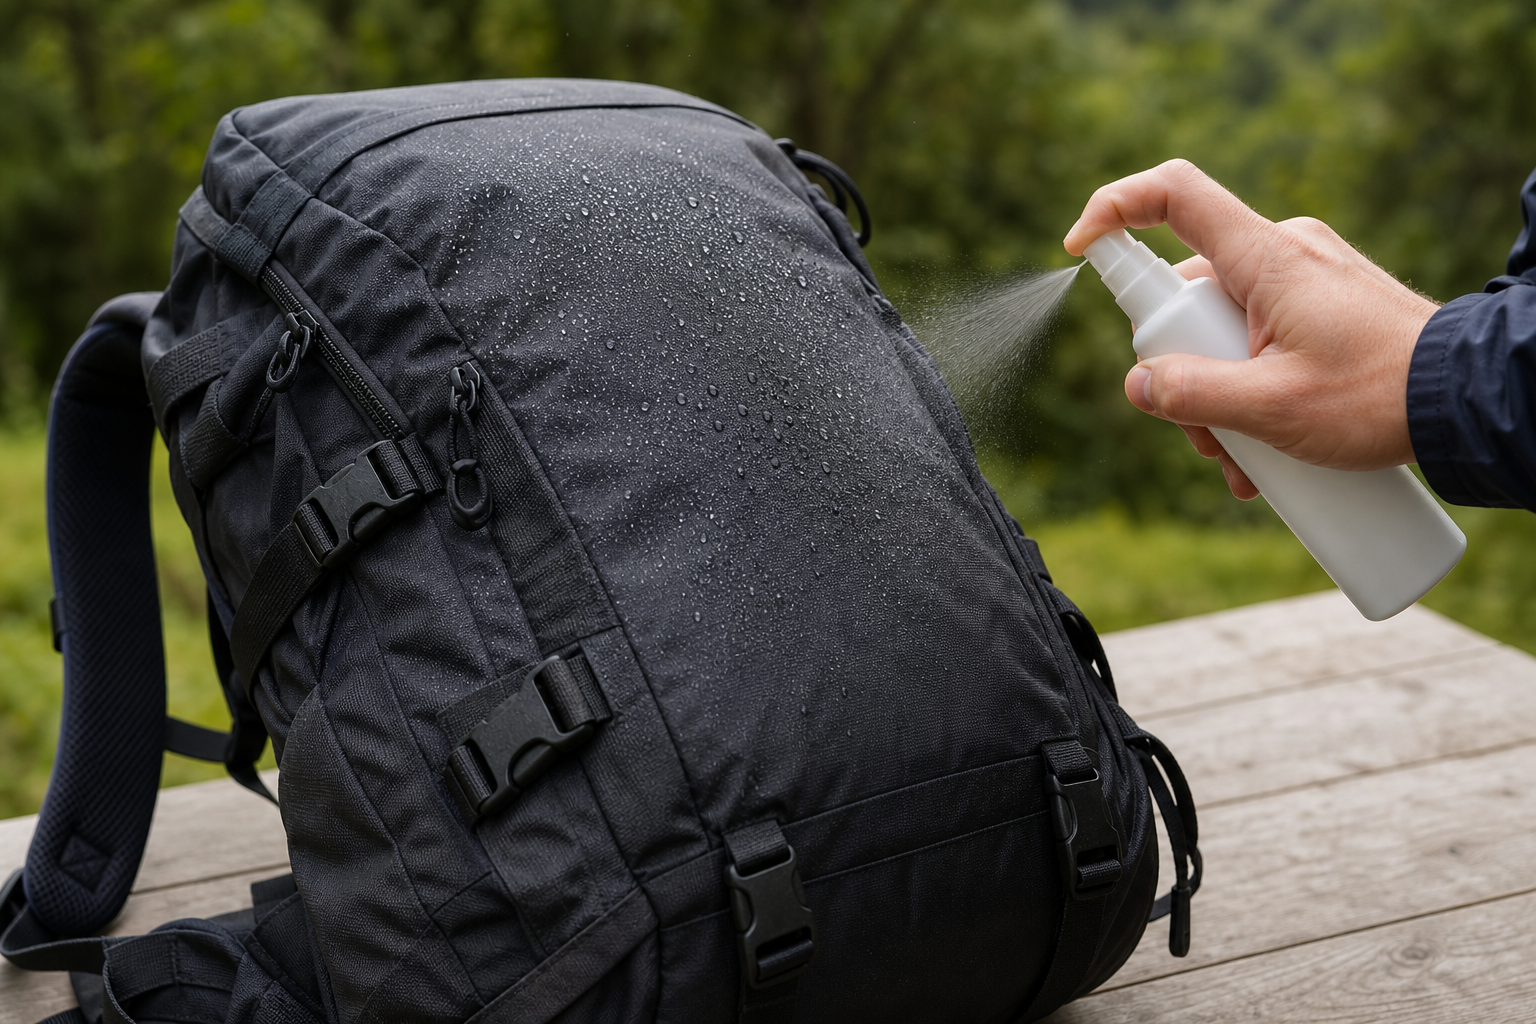
How to Reproof the Outside of Your Backpack
This is the core waterproof backpack guide process: clean the fabric, apply a suitable spray evenly, wipe away excess, then test before trusting it on a wet walk.
What to buy
For most nylon and polyester hiking packs, choose a spray-on waterproofer rather than a wash-in treatment. Wash-in products can affect foam padding, mesh pockets and straps, and they treat parts of the bag that do not need it.
My preference is Nikwax TX.Direct Spray-On for older walking packs because it is easy to control and does not need heat activation. Expect to pay about £12 for a 300ml bottle. Grangers Performance Repel Plus is a good alternative at about £12-£14, especially if you already use Grangers on waterproof jackets. For seam work, Gear Aid Seam Grip +WP costs about £9-£11 from Amazon UK or outdoor shops.
You will also need:
- A clean cloth: for wiping excess from buckles, zip pulls and mesh.
- A covered work area: a patio table or garage floor is better than the kitchen.
- Nitrile gloves: cheap supermarket gloves are fine.
- Two hours drying time: longer if the house is cold or damp.
Step-by-step reproofing
- Start with a clean damp pack: the surface should not be muddy, greasy or bone dry.
- Open compartments: loosen straps and expose folds around the lid, front pocket and base.
- Spray from 15-20cm away: use steady passes rather than soaking one patch.
- Work into seams: use a cloth to spread treatment around stitch lines and compression strap anchors.
- Wipe off runs: puddles dry tacky and can mark darker fabric.
- Leave it to dry naturally: avoid tumble dryers, hairdryers and radiators unless the product instructions say otherwise.
- Repeat the water-bead test: if water still soaks in on high-wear panels, apply a second light coat there only.
Do not spray the inside of the pack unless the product specifically says that is safe. I have seen old coatings turn sticky after being treated with the wrong product, and once that happens the bag is miserable to use.
Use a Rain Cover, Pack Liner, or Dry Bags
Spray improves the outer fabric. It does not protect the opening every time you unzip the lid in rain, and it does not stop water creeping through stitch holes under sustained pressure. For proper UK hill use, layer your protection.
Rain covers are useful, with limits
A rain cover is the cheapest visible upgrade. Decathlon’s Forclaz rain covers are usually about £10-£15 depending on size. Osprey’s Ultralight Raincover is nearer £30-£38, but the shape and elastic tend to sit better on Osprey and similar hiking packs.
Rain covers work well for steady rain on open paths. They are less good in wind, where they can flap, lift or dump water down the back panel. They also leave the shoulder straps and hip belt exposed. I still carry one on long wet walks, but I do not trust it as the only protection for electronics.
The GOV.UK Countryside Code tells walkers to plan ahead and be prepared; in practical terms, that means not relying on luck when the forecast looks wet.
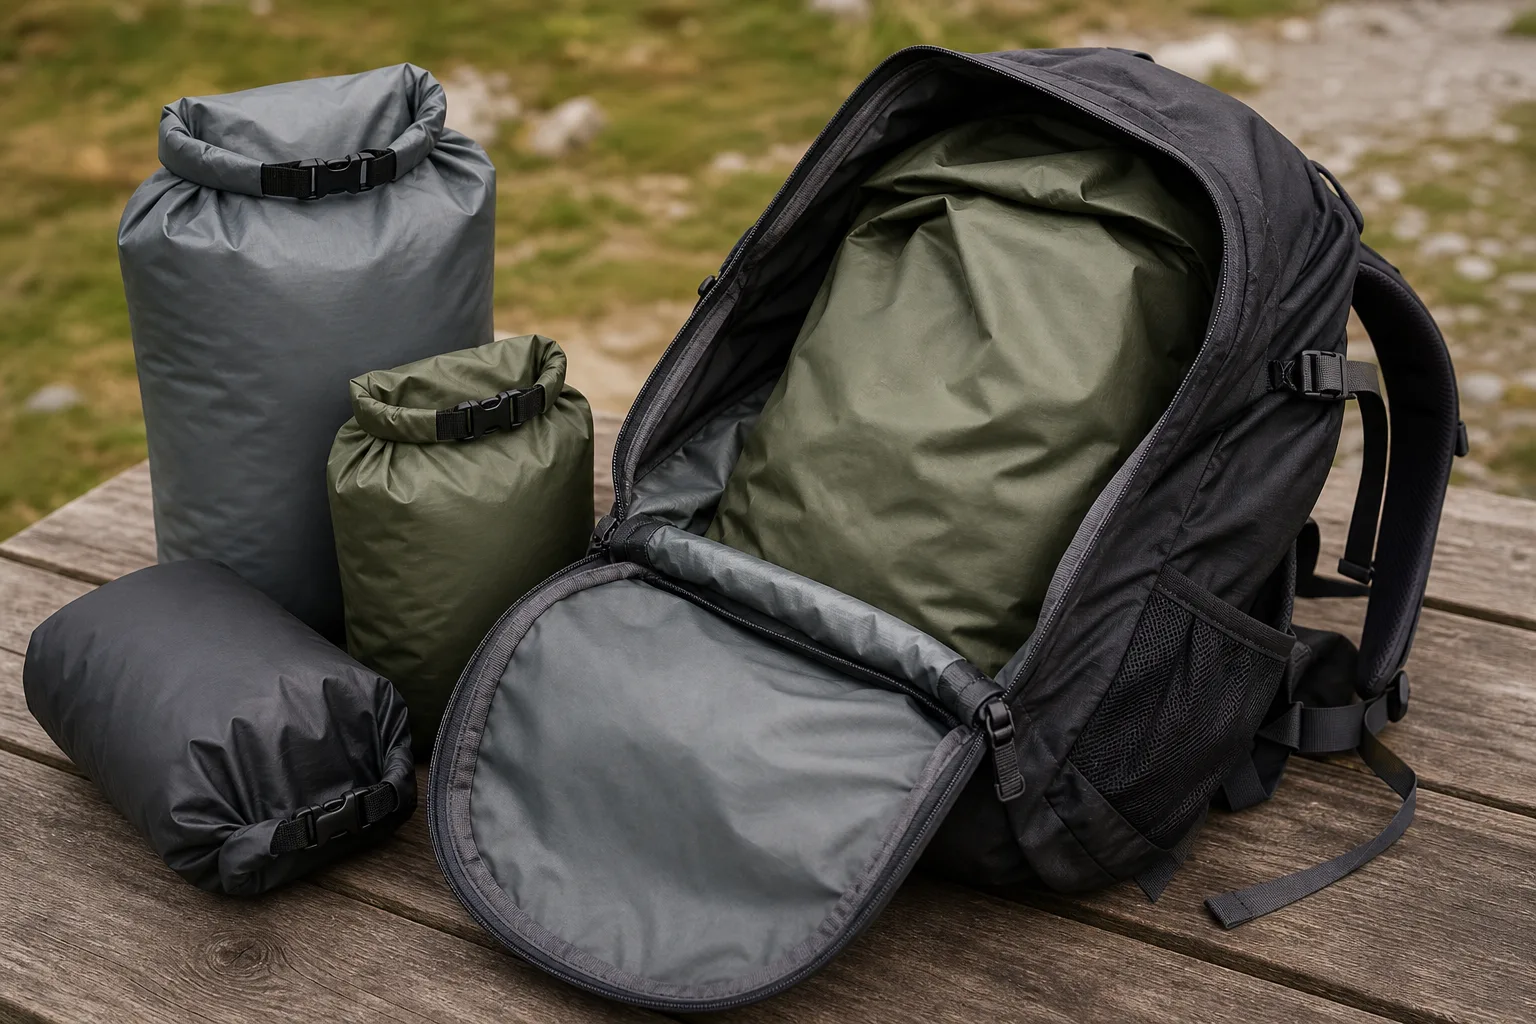
Pack liners protect the whole load
A pack liner is a large waterproof bag that sits inside the backpack. Sea to Summit Ultra-Sil Pack Liners cost about £25-£35 depending on capacity. Exped Fold Drybags are usually £14-£20 for useful clothing sizes. A heavy-duty rubble sack from Screwfix costs under £5 and works better than people like to admit, though it is noisier and less durable.
For a day walk, I would line the main compartment and put the phone, keys and spare warm layer in a separate dry bag. For a multi-day trip, use colour-coded dry bags so you are not rummaging in rain.
This also links neatly with packing discipline. If the load is badly arranged, water protection gets harder because sharp stove parts, poles and tent pegs rub holes in liners. Our multi-day rucksack packing guide covers that load order in more detail.
Dry bags for critical kit
Use dry bags for the items that would stop the walk or ruin the evening:
- Warm layer: fleece or insulated jacket.
- Sleep kit: sleeping bag, liner and night clothes.
- Electronics: phone, battery pack, head torch and camera.
- Paper essentials: map, tickets, permits and emergency notes.
I would rather spend £18 on two dry bags than £18 on a second bottle of spray. Spray protects the bag. Dry bags protect the trip.
Fix Seams, Zips, and Worn Base Panels
If the fabric beads well but the inside still gets wet, look at the construction. Backpacks are full of stitched holes, zip curves and stressed corners.
Seam leaks
Turn the empty pack inside out as far as you can and look for dark trails after a water test. Seam tape can peel on old packs, especially around the lid and base. Gear Aid Seam Grip +WP is the usual repair product at about £9-£11. Apply a thin line to the inside seam, spread it with the nozzle or a gloved finger, then let it cure overnight.
Do not use bathroom silicone. It is messy, stiff and hard to repair later.
Zip leaks
Water-resistant zips slow rain but are not watertight. Keep them clean, close them fully, and park the zip pulls under the garage if the pack has one. A tiny smear of zip lubricant can help a stiff zip close cleanly; Gear Aid Zipper Lubricant is usually about £5-£7.
If the zip teeth are separating, waterproofing is the wrong job. That is a repair or replacement decision.
Base panel wear
The base takes the abuse. Wet grass, grit, train floors, bothy benches and car boots all wear the coating. If the base fabric is only scuffed, add a second light spray coat and use a pack liner. If there are pinholes, patch from the inside with Tenacious Tape, about £8-£10, then keep heavy or sharp kit away from that area.
For backpacks used mostly on trains, campsites and lowland paths, that repair may last years. For rocky scrambling or regular wild camping, treat it as borrowed time.
When a Backpack Is Too Far Gone
Sometimes the practical answer is to stop spending money on waterproofing.
Replace rather than reproof if the structure has failed
Reproofing is worth trying when the pack is comfortable, the seams are intact, and the fabric has simply stopped beading water. I would not bother if:
- The internal coating is flaking everywhere: it will keep shedding into your kit.
- The base has several holes: liners will snag and patches will keep lifting.
- The zip is failing: rain is the least of your problems if the pack opens on the hill.
- The harness no longer fits: a dry uncomfortable pack is still a bad pack.
If you are at that point, compare replacement options in our waterproof rucksack guide or start with the wider backpacks buying guide for beginners. A budget waterproof day pack can be around £35-£60 from Decathlon, while a serious hiking pack from Osprey, Deuter or Gregory is more like £110-£180.
My practical setup for UK rain
For most UK day walks, my choice would be:
- Reproofed existing backpack: one £12 spray treatment once water stops beading.
- Rain cover: £10-£15 Decathlon cover for basic weather protection.
- Two dry bags: one for a warm layer, one for electronics and paper items.
- Regular cleaning: rinse mud and grit before they abrade the coating.
That setup is cheaper than replacing a good pack too early and more reliable than pretending spray alone makes everything waterproof.
For longer routes, combine this with the comfort checks in our rucksack fitting guide. A rainproof pack still needs to carry properly when wet kit adds weight.
Frequently Asked Questions
Can you make any backpack waterproof? No. You can make most hiking backpacks more water-resistant, but stitched seams, zips and worn coatings mean they will not become fully waterproof.
What is the best spray for waterproofing a backpack? Nikwax TX.Direct Spray-On is the one I would buy first for most nylon packs. It costs about £12, is easy to apply, and avoids soaking straps and padding in a wash-in treatment.
Do backpack rain covers actually work? Yes, for normal rain, but they are not perfect in wind and they do not protect the back panel, straps or open pockets. Use a liner or dry bags for critical kit.
Should I waterproof the inside of my backpack? Usually no. Treat the outside fabric and use a pack liner inside. Spraying old internal coatings can make them sticky or flaky.
How often should I reproof a hiking backpack? Reproof when water stops beading on clean fabric. For regular UK walkers, that might be once or twice a year; for occasional use, it may be much less.
Is a pack liner better than dry bags? A liner protects the whole main compartment, while dry bags protect specific items. For wet UK walks, using both is the most reliable setup.